Hey Babe!
Do you ever get curious on what’s the use of base coat and top coat on your manicure?
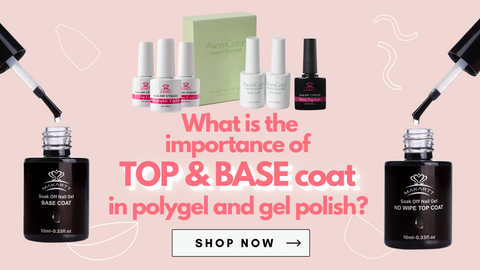
Well, a good quality base coat and top coat work hand in hand in achieving that chip-free and long-lasting manicure!
The base coat seals the oil from the nails so the gel polish or polygel can adhere entirely to get a chip-free manicure, while the top coat seals the manicure and give a shiny or matte look depending on your chosen nail look!
Note: These products need to be cured with a UV/LED curing lamp. The length of time required to dry will depend on the curing lamp. To remove, use a cotton ball soaked in acetone and wrap your finger in foil until the colors come loose. Once loose, you can use a scraper to scrape off the excess, just like gel polish.
Let’s learn more!
Base coat contains vitamins and protein that protect the nails and extend the manicure’s life.
- It also protects the nails and bonds with gel polish or polygel. It leaves a bit of a sticky feel that makes the polish adhere completely, so it is recommended for you not to wipe it off before applying your chosen gel polish or polygel product.
- It is also used to avoid the gel polish or polygel on lifting and chipping easily.
Importance of the base coat:
- It is the first defense for nails.
- Base coat acts as a defense by adding a defensive layer from staining your natural nails when using dark-colored gel polish or polygel.
- Base coat seals the oil from the nails so the gel polish or polygel can adhere to it entirely.
- It fills all the ridges, provides a smooth surface for the nail polish to spread evenly, and helps the gel polish or polygel stick better.
How to apply the base coat?
- In every gel polish or polygel manicure, the base coat should always come first after nail preparations. Apply the base coat thinly the same way as gel polish and cure for at least 30 seconds. Make sure to apply at least three strokes and permanently seal the free edge to avoid the polish from chipping.
- Apply your gel polish and cure for 30 sec.
- Apply your chosen glossy or matte top coat and cure.
- It is suitable for natural nails, UV gel nails, artificial nails, acrylic nails, nail tips that provide durability and ensure a long-lasting manicure that seals in color and provides a matte, glitter, or glossy finish.
- The top coat enhances the appearance of your nail polish by making it shiny, glossy, or matted as you wish; plus, it speeds up the drying process.
- Aside from that, the top coat helps preserve the nails and keeps the loose crystal or glitters in place for your nail designs.

TYPES OF TOP COAT
WIPE OFF and NO-WIPE OFF TOP COAT – It’s a no-brainer, babe! You can already tell the difference by their names ;)
- Gel has an inhibition layer with carbon depending on the polish you use, so for wipe off the top coat, you wipe the layer with alcohol or acetone to clean the top surface.
- No-wipe coat advantage- It generally has a thicker consistency for layering nail art and smooths out the nail surface automatically.
- The no-wipe coat is used to seal the nail for sugar nails or glitter nails, so there will be no sticky residue after use. It is already smooth and glossy when used to save time and effort!
- This top coat provides durability and ensures a long-lasting manicure that seals in color and provides a matte (without a glossy) finish.
- This top coat provides a glittery and glossy finish. (No need for a separate glitter manicure!)
How to apply the top coat:
- Apply the top coat the same way as gel polish and cure for at least 30 seconds or more, depending on your nail design. (Check out my gel polish and polygel blog for the step-by-step process in applying the base coat, gel polish, or polygel then top coat)
- It is the final step in the gel/polygel manicure. It serves as the armor to the manicure.

There you go! I hope this blog helps in achieving your long-lasting and chip-free manicure!
xoxo


Comments (13)
I purchased your product through Amazon. When it arrived the box can with no instructions on how to use or how long to cure your nails under the little light. Could you send me instructions please. I purchased lil Parisian in pink. I am waiting for your instructions, thank you in advance.
http://slkjfdf.net/ – Ofesiroi Odizadidu akc.boyd.makartt.com.jni.di http://slkjfdf.net/
http://slkjfdf.net/ – Kodelehu Iomego llz.xgnk.makartt.com.zub.xr http://slkjfdf.net/